How I built a Signal K server with a PiCAN-M board to read my boat's NMEA 2000 network: why, what to buy, and how. Including the parts I didn't need.
By Steve Harding, founder10 min read
Back in Your boat talks I promised another post about fitting a Raspberry Pi behind the helm of my own boat. This is it.
I’m not an electronics engineer. This was my first Raspberry Pi. If I can do it, with a fair amount of help and one or two wrong turns, you probably can too.
You don’t have to do it alone. Your AI system of choice, such as Claude or ChatGPT, can guide you through it step by step, and help when something doesn’t go to plan. That’s how I got through mine.
Why bother?
Baby Blush already has an Actisense W2K Wi-Fi gateway, and Saltlog reads it happily.
So why build anything else? Because I wanted to explore what else is possible. NMEA 2000 networks can carry things that NMEA 0183, the format a gateway passes along, has no standard sentences for, such as engine temperature, oil pressure, fuel and tanks.
Where a boat’s devices send that detail, it travels on the NMEA 2000 network, the backbone cable that links my Garmin chartplotter, transducer and Mercury SmartCraft. To listen to it directly, you plug something into the backbone. That’s what this build does:
Instruments → NMEA 2000 backbone → PiCAN-M → Raspberry Pi running Signal K → Wi-Fi → Saltlog on your phone
The Raspberry Pi is a small, cheap computer. It runs the software.
The PiCAN-M is a board that sits on top of the Pi and connects it to the backbone.
Signal K is free, open software that collects everything on the network and puts it in one modern format.
OpenPlotter is a free package for boats that bundles Signal K with the Pi’s operating system.
What you get depends on what your devices actually send. A boat with no tank senders won’t suddenly know its tank levels.
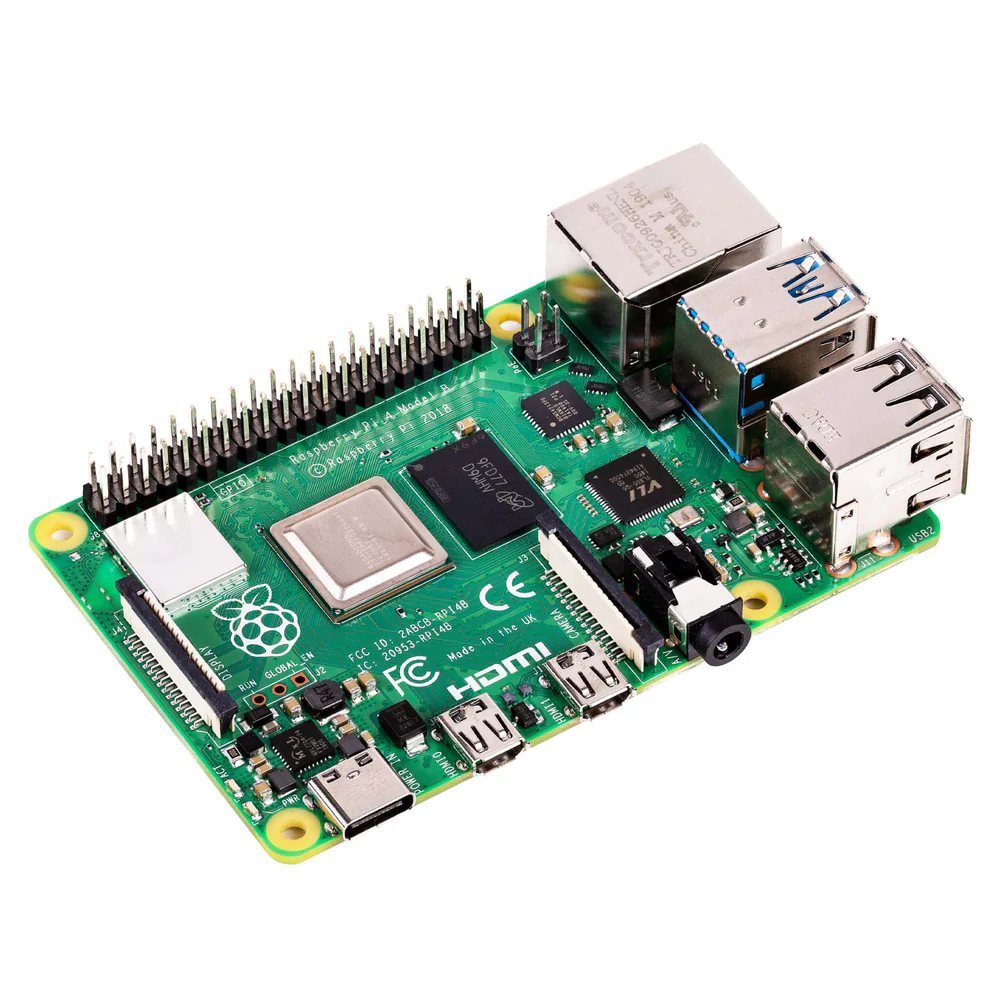
The Raspberry Pi 4 Model B. The PiCAN-M sits on top, on those 40 pins.
Do you need this at all?
Probably not. An NMEA Wi-Fi gateway is simpler, it’s tested and working on my own boat, and it’s where I’d suggest anyone starts. And if you have a Victron Cerbo GX aboard, it may be able to run Signal K itself. Build this if you enjoy a project and want to explore what else your network carries.
Build and deployment are two different jobs
This is the thing I most wish I’d understood at the start, because it decides what you buy.
The build happens at home, at the kitchen table. You install the software and get the Pi and PiCAN-M talking to each other. It needs mains power and home Wi-Fi, and no boat.
Deployment happens on the boat. You plug into the backbone, power it from the boat, box it up and connect Saltlog.
Do the build at home. An hour or two of installing and restarting is far nicer at a table than upside down under a dashboard. Some parts are only for one job or the other.
What you’ll need
Prices are rough UK prices from October 2026.
The essentials
Part
About
Build
Deployment
What I did
Raspberry Pi 4 Model B (3 GB is plenty)
£65–80
Yes
Yes
Used
microSD card, branded, A2 rated, 32–64 GB
£10
Yes
Yes
Used a 64 GB
PiCAN-M with Micro-C connector and 3A power supply (SK Pang)
£74 + VAT and postage
Yes
Yes
Used
USB-C microSD reader, for your computer
£8
Yes, once
No
Used once, now in a drawer
Official 15 W USB-C mains power supply
£8
Yes
No, stays at home
Used at home only
NMEA 2000 drop cable, 1 m, Micro-C, male one end and female the other (Actisense A2K-TDC)
You can leave all of this until you know the setup works.
Part
About
Build
Deployment
What I did
IP67 junction box, about 100 mm deep
£15–20
No
Permanent fit
Bought, not fitted yet
Fixing plate for the IP67 box, so the Pi screws to the plate and not the box
Often included with the box
No
Permanent fit
Recommended
Cable glands, M20 and M25
£6
No
Permanent fit
Bought
M2.5 nylon standoffs
£6
No
Permanent fit
Recommended
Step drill bit, for the gland holes
£10
No
Permanent fit
Only if you don't own one
Silica gel sachets
£3
No
Permanent fit
Recommended
A word on the box. Check the depth, not just the footprint. The Pi and board are small, but the NMEA plug and its cable bend need height, so I went for about 100 mm. Mine looks rather big for what’s in it, and I don’t mind that: there’s room to work, and air around a Pi with no fan.
What you can skip
A USB GPS dongle. It’s often suggested for testing. Your boat’s GPS is already on the backbone.
A screen, keyboard and micro-HDMI cable. I set the whole thing up from my laptop.
A 12 V to USB-C adapter. The PiCAN-M’s power supply runs the Pi from the boat.
A Raspberry Pi 5. According to the maker, the PiCAN-M’s power supply can’t provide the current a Pi 5 needs, so you’d need a second supply on the boat.
A pre-loaded SD card. It comes with the wrong software, so you’d be rewriting it anyway.
The free software
Raspberry Pi Imager, to write the card
OpenPlotter 4 Headless, from openplotter.readthedocs.io (“Headless” means no screen needed)
TigerVNC, to see the Pi’s desktop from your laptop
And on the phone, Saltlog. Connecting to a boat’s instruments is part of Saltlog Plus.
Part 1: The build, at home
Write the card. Use Raspberry Pi Imager and the card reader to put OpenPlotter Headless on the microSD card.
Start the Pi, without the PiCAN-M. Put the card in and plug in the mains USB-C. Give it a few minutes.
Join its Wi-Fi. The Pi makes its own network, called openplotter, at the address 10.42.0.1. Join it from your laptop and connect with TigerVNC. I tried Mac Screen Sharing and RealVNC first, and neither suited.
Change the default passwords. Do this before anything else. There’s the Pi’s own login and the Wi-Fi hotspot’s password. Both defaults are published on the internet. The hotspot’s password is set with:sudo nmcli connection modify "OpenPlotter-Hotspot" wifi-sec.psk "your-new-password"
Join your home Wi-Fi. This makes the rest of the setup easier. After that the Pi is at openplotter.local. Expect VNC to freeze for a moment while the Wi-Fi switches over. If the password box won’t take typing over VNC, as mine wouldn’t, use sudo nmcli dev wifi connect from the command line instead.
Secure Signal K. Open openplotter.local:3000 and create an admin user. I allowed read-only access, so that Saltlog can read data without logging in, and turned off new user registration. Don’t update Signal K from its admin page until everything’s working.
Shut down, unplug, and fit the PiCAN-M. Line it up with the Pi’s 40 pins, press down evenly until it’s fully seated, and fix it with the spacers.
Check the terminator is off. The board has a 120 Ω terminator, marked JP1. Your backbone already has its two terminators, and a third can cause trouble. On my board JP1 was just two empty holes, so it couldn’t be on. If yours has pins and a jumper, leave the jumper off.
Tell OpenPlotter about the board. Power up on USB-C, then from the desktop go to the raspberry menu → OpenPlotter → CAN Bus → MCP2515 tab, and add a device with these settings: interface SPI0 CE0, oscillator 16000000 (the crystal on my board reads 16.000), interrupt GPIO 25 (physical pin 22).
Turn on SPI and reboot. It will warn you that SPI is off. Turn it on under raspberry menu → Preferences → Raspberry Pi Configuration → Interfaces, then reboot. It didn’t offer to reboot for me, so I did it by hand.
Connect Signal K to the board. Back in CAN Bus → MCP2515, select the row and click Add Connection. Restart Signal K when asked.
Check it. Over SSH, run the line below. You’re looking for can0 at 250000 with state ERROR-ACTIVE or UP. The Signal K dashboard should be all green.ip -details link show can0
That’s as far as you can go at home. There’s nothing on the end of the cable to talk to yet.
Part 2: Deployment, on the boat
Shut the Pi down properly and unplug the USB-C. Wait for the green light to stop flickering first. The mains supply stays at home.
Work out how you’ll power it. You have two choices. Through the drop cable: one cable does everything. The PiCAN-M’s power supply takes 12 V from the backbone, and the Pi comes on and off with your instruments, which suits a logbook. This is my plan. Its own fused 12 V feed: from a switched supply into the +12V and GND pads on the board, through a 3 A fuse.
To decide, find the fuse on the lead that powers your backbone. It’s usually on a T-piece with a red and black lead going to the panel. The Pi and PiCAN-M draw roughly 0.5 A, and about 0.8 A for a few seconds at start-up. With a small network like mine I estimate about 1 A in total, so a 3 A fuse is comfortable. If yours is 1 A, or your network has a lot on it, use the separate feed.
Never power it from USB-C and the boat at the same time.
Plug in, with the instruments off. Connect the drop cable from the PiCAN-M to a spare socket on the backbone, or a T-piece. Then switch the instruments on, and the Pi should start.
Check the data is arriving. Join the phone or laptop to the Pi’s openplotter Wi-Fi, go to 10.42.0.1:3000 and open the Data Browser. If it fills with readings, the job is done. If it doesn’t, you’ll be glad the box isn’t sealed yet.
Connect Saltlog. On your phone, join the Pi’s Wi-Fi. In Saltlog, open your vessel, tap Connect vessel GPS and choose Signal K. Then run a Quick Log.
Box it up, once it works. Mount the Pi on standoffs on the box’s fixing plate, drill for the glands and add silica gel. Keep it below deck and away from hatches. A boat’s cabin is damp and salty, and over a season that corrodes a bare circuit board.
Protect the SD card, last of all. When the instruments go off, the Pi loses power instantly, and repeated power cuts can eventually corrupt the card. A read-only setting prevents this. Do it last, because changing anything afterwards means turning it off first.
Where I’ve got to
The build is finished. The Pi and PiCAN-M are working together, Signal K is connected to the board, and everything that can be proved at home has been proved. The real test is on Baby Blush, and I’ll report back on what the backbone actually gives up, what doesn’t work, and how long I spend upside down beneath the dashboard.
Working on your boat’s electrics is your responsibility. Fuse everything properly, and if you’re not confident, ask a marine electrician.
If you’ve built one of these, I’d love to hear how it went and what your boat sends: support@saltlog.co.uk.